User Interface Manager
Table of Contents
Prior to GTK+ 2.4, there were several APIs in use to create menus and toolbars. GTK+ itself included GtkItemFactory, which was historically used in the GIMP; libgnomeui provided the gnome-ui set of macros; libbonoboui provided a complex mechanism to do menu merging across embedded components. GTK+ 2.4 includes a system for creating menus and toolbars, with merging of items, based around the GtkAction mechanism.
GtkAction represents an operation that the user can perform from the menus and toolbars of an application. A GtkAction has a name, which is its identifier, and it can have several widgets that represent it in the user interface. For example, an action for EditCopy can have a menu item as well as a toolbar button associated to it. If there is nothing selected in the document, the application can simply de-sensitize the EditCopy action; this will cause both the menu item and the toolbar button to be de-sensitized automatically. Similarly, whenever the user selects the menu item or the toolbar button associated to the EditCopy action, the corresponding GtkAction object will emit an 'activate' signal.
Normal actions are simply commands, such as FileSave or EditCopy. Toggle actions can be active or inactive, such as FormatBold or ViewShowRulers. Radio actions define a set of items for which one and only one can be active at a time, for example, { ViewHighQuality, ViewNormalQuality, ViewLowQuality }.
GtkActionGroup is simply a group of GtkAction objects. An application may want to have several groups: one for global actions such as "new document", "about", and "exit"; then one group for each open document with actions specific to the document, such as "cut", "copy", "paste", and "print".
GtkUIManager is an object that can construct menu and toolbar widgets from an XML description. These widgets are in turn associated to corresponding actions and action groups. GtkUIManager supports merging of menus and toolbars for applications that have multiple components, each with separate sets of commands. For example, a word processor that can embed images may want to have toolbar buttons for Bold and Italic when the cursor is on a text block, but Crop and Brightness/Contrast buttons when the cursor is on an image. These actions, which change depending on the state of the application, can be merged and de-merged from a GtkUIManager as appropriate. In XFC, Gtk::Action, Gtk::ActionGroup and Gtk::UIManager are the corresponding C++ classes for these GTK+ objects.
Overview
The GTK+ user interface manager (Gtk::UIManager) constructs menus and toolbars from one or more user interface (UI) definitions, which reference actions from one or more action groups. The UI definitions are in XML format and can be roughly described by the following document type definitions (DTD).<!ELEMENT
ui
(menubar|toolbar|popup|accelerator)* >
<!ELEMENT menubar
(menuitem|separator|placeholder|menu)* >
<!ELEMENT menu
(menuitem|separator|placeholder|menu)* >
<!ELEMENT popup
(menuitem|separator|placeholder|menu)* >
<!ELEMENT toolbar
(toolitem|separator|placeholder)* >
<!ELEMENT placeholder
(menuitem|toolitem|separator|placeholder|menu)* >
<!ELEMENT menuitem EMPTY >
<!ELEMENT toolitem EMPTY >
<!ELEMENT separator EMPTY >
<!ELEMENT accelerator EMPTY >
<!ATTLIST menubar
name
#IMPLIED
action
#IMPLIED >
<!ATTLIST toolbar
name
#IMPLIED
action
#IMPLIED >
<!ATTLIST popup
name
#IMPLIED
action
#IMPLIED >
<!ATTLIST placeholder
name
#IMPLIED
action
#IMPLIED >
<!ATTLIST separator
name
#IMPLIED
action
#IMPLIED >
<!ATTLIST menu
name
#IMPLIED
action
#REQUIRED
position (top|bot) #IMPLIED >
<!ATTLIST menuitem
name
#IMPLIED
action
#REQUIRED
position (top|bot) #IMPLIED >
<!ATTLIST toolitem
name
#IMPLIED
action
#REQUIRED
position (top|bot) #IMPLIED >
<!ATTLIST accelerator
name
#IMPLIED
action
#REQUIRED >There are some additional
restrictions beyond those specified in the
DTD. For example, every toolitem must have a toolbar in its ancestry
and every menuitem must have a menubar or popup in its ancestry. Since
a GMarkup parser is used to parse the UI description, it must not only
be valid XML, but valid GMarkup. If a name is not specified, it
defaults to the action. If an action is not specified either, the
element name is used.
A UI definition looks like this:
<ui>

  <menubar>

    <menu name="FileMenu" action="FileMenuAction">

      <menuitem name="New"
action="New2Action" />

      <placeholder name="FileMenuAdditions"
/>

    </menu>

    <menu name="JustifyMenu"
action="JustifyMenuAction">

      <menuitem name="Left"
action="justify-left"/>

      <menuitem name="Centre"
action="justify-center"/>

      <menuitem name="Right"
action="justify-right"/>

      <menuitem name="Fill"
action="justify-fill"/>

    </menu>

  </menubar>

  <toolbar action="toolbar1">

    <placeholder name="JustifyToolItems">

      <separator/>

      <toolitem name="Left"
action="justify-left"/>

      <toolitem name="Centre"
action="justify-center"/>

      <toolitem name="Right"
action="justify-right"/>

      <toolitem name="Fill"
action="justify-fill"/>

      <separator/>

    </placeholder>

  </toolbar>

</ui>
The constructed widget hierarchy
is very similar to the element tree of
XML, with the exception that placeholders are merged into their
parents. The correspondence of XML elements to widgets should be almost
obvious:
- menubar - a Gtk::MenuBar
- toolbar - a Gtk::Toolbar
- popup - a toplevel Gtk::Menu
- menu - a Gtk::Menu attached to a menuitem
- menuitem - a Gtk::MenuItem subclass, the exact type depends on the action
- toolitem - a Gtk::ToolItem subclass, the exact type depends on the action
- separator - a Gtk::SeparatorMenuItem or Gtk::SeparatorToolItem
- accelerator - a keyboard accelerator
There is only one constructor to call to create a UIManager object:
UIManager();To load UI definitions from an XML source file, call the following method:
unsigned int add_ui_from_file(const
String& filename,
G::Error *error = 0);
The 'filename' argument is the name of the file to parse and 'error' is the return location for an error, if one occurs. An integer id is returned that identifies the UI definitions added or merged. This id can later be used to remove or de-merge those definitions.
To load UI definitions from a source string, call either of these methods:
unsigned int add_ui_from_string(const
char *buffer, int length = -1, G::Error *error
= 0);


unsigned
int add_ui_from_string(const
String& buffer, G::Error *error = 0);
The 'buffer' argument is the source string that contains the UI definitions. In the first method, 'length' defaults to minus one if the buffer is null-terminated, otherwise it is the length of the buffer. The 'error' argument and return value are the same as for add_ui_from_file() above.
Once the UI definitions are loaded, the UIManager object creates the menus and toolbars. You can retrieve pointers to the new menubar and toolbar(s) by calling the following method:
Gtk::Widget*
get_widget(const
String& path) const;
The 'path' argument consists of the names specified in the XML description of the UI separated by '/'. Elements which don't have a name or action attribute in the XML (e.g. \<popup\>) can be addressed by their XML element name (e.g. "popup"). The root element ("/ui") can be omitted in the path.
For the example UI definition above, the following calls will retrieve a pointer to the menubar and toolbar:
Gtk::Widget
*widget = manager->get_widget("/MenuBar");


Gtk::Widget *widget = manager->get_widget("/Toolbar1");
UI Merging
The most remarkable feature of the user interface manager is that it can overlay a set of menu items and tool items over another one, and de-merge them later. Merging is done based on the names of the XML elements. Each element is identified by a path which consists of the names of its ancestors, separated by forward slashes. For example, the menuitem named "Left" in the example above has the path /ui/menubar/JustifyMenu/Left and the toolitem with the same name has path /ui/toolbar1/JustifyToolItems/Left.You will find a good example of UI merging in the <tests/mergemenus> subdirectory. The example has 3 XML files each containing several UI definitions. When the 'mergemenus' test application is launched the 3 UI definition files are loaded, parsed and merged. You can then uncheck and check one or more check buttons to dynamically de-merge and merge one or more UI definitions. As you de-merge and merge the UI definitions you will see the menus and toolbar updated accordingly.
To merge UI definitions you can either call add_ui_from_file() or add_ui_from_string(), but you can also call the following method:
void add_ui(unsigned int merge_id, const
String& path, const String& name, const String& action,
UIManagerItemType type = UI_MANAGER_AUTO, bool top = false);


void
add_ui_separator(unsigned int
merge_id, const
String& path, const
String& name, bool top
= false);
The first method adds a UI element to the current contents of the UIManager and the second method adds a separator. The 'merge_id' is a unqiue identifier for the merged UI definitions and can be obtained by calling:
unsigned int new_merge_id();The 'path' argument is the element's path, 'name' is its name and 'action' is the name of the action to be proxied, or null to add a separator. The 'type' argument is the type of element to add and can be one of the following values from the Gtk::UIManagerItemType enum:
- UI_MANAGER_AUTO - pick the type of the UI element according to context.
- UI_MANAGER_MENUBAR - create a menubar.
- UI_MANAGER_MENU - create a menu.
- UI_MANAGER_TOOLBAR - create a toolbar.
- UI_MANAGER_PLACEHOLDER - insert a placeholder.
- UI_MANAGER_POPUP - create a popup menu.
- UI_MANAGER_MENUITEM - create a menuitem.
- UI_MANAGER_TOOLITEM - create a toolitem.
- UI_MANAGER_SEPARATOR - create a separator.
- UI_MANAGER_ACCELERATOR - install an accelerator.
Accelerators
Every action has an accelerator path. Accelerators are installed together with menuitem proxies, but they can also be explicitly added with <accelerator> elements in the UI definition. This makes it possible to have accelerators for actions even if they have no visible proxies.Smart Separators
The separators created by the user interface manager are 'smart', that is, they do not show up in the user interface unless they end up between two visible menu or tool items. Separators which are located at the very beginning or end of the menu or toolbar containing them, or multiple separators next to each other, are hidden. This is a useful feature, since the merging of UI elements from multiple sources can make it hard or impossible to determine in advance whether a separator will end up in such an unfortunate position.Empty Menus
Submenus pose similar problems to separators in connection with merging. It is impossible to know in advance whether they will end up empty after merging. The user interface manager offers two ways to treat empty submenus:- make them disappear by hiding the menu item they're attached to
- add an insensitive 'Empty' item
Actions
Actions represent operations that the user can perform, along with information about how it should be presented in the interface. Each action provides methods to create icons, menu items and toolbar items representing itself.As well as the callback slot that is called when an action gets activated, the following also gets associated with an action:
- a name used for path lookup
- a label used for display
- an accelerator
- an optional tooltip
- an optional toolbar label that is shorter than the label
- visibility - either shown or hidden
- sensitive - either enabled or disabled
Usually you wont construct new actions and add them to an action group separately. Instead you will call the overloaded add() methods declared in Gtk::ActionGroup and Gtk::RadioActions. These are convenience methods that create a new action for you and add it to the action group. A pointer to the newly created action is returned so you can connect a callback slot to the 'activate' signal, or set one or more action properties.
For example, these are two of the overloaded add() methods declared in Gtk::ActionGroup:
Gtk::Action* add(const char *name, const
StockId& stock_id, const char *tooltip = 0);


Gtk::ToggleAction* add(const char
*name, const StockId&
stock_id, bool is_active, const char *tooltip = 0);
The first method creates a normal action and the second creates a toggle action. The 'name' argument is the unique name for the action, 'stock_id' is the stock icon to display and 'tooltip' is the optional tooltip text. The 'is_active' argument specifies whether the new toggle action should be activated initially.
Radio actions are different. Their add() methods are declared in Gtk::RadioActions. To add radio actions to an action group, first create a RadioActions object on the stack. Then call one of its overlaoded add() methods to add a radio action to the RadioActions object.
This is the RadioActions add() method that corresponds to the above two add() methods:
Gtk::RadioAction* add(const char *name,
const StockId& stock_id, int value, const char *tooltip = 0);
The 'value' argument is the value get_current_value() should return if the radio action is selected. After adding all the radio actions to the RadioActions object you call the following method to add the radio actions to the action group:
void add_actions(const
Gtk::RadioActions&
group, int value, const ChangedSlot& slot);
The 'group' argument is the RadioActions object whose radio actions are to be added to the action group, 'value' is the value of the radio action to activate initially and 'slot' is the callback slot to connect to the radio action's 'changed' signal.
You should have a look at the Action example below and in the <tests/actions> subdirectory. These examples show you how to load the UI definitions from a source string and a disk file.
Action Groups
Actions are organised into groups. An action group is essentially a map from names to Gtk::Action objects. All actions that would make sense to use in a particular context should be in a single group. Multiple action groups may be used for a particular user interface. In fact, it is expected that most nontrivial applications will make use of multiple groups. For example, in an application that can edit multiple documents, one group holding global actions (e.g. quit, about, new), and one group per document holding actions that act on that document (eg. save, cut/copy/paste, etc). Each window's menus would be constructed from a combination of two action groups.Accelerators are handled by the GTK+ accelerator map. All actions are assigned an accelerator path (which normally has the form <Actions>/group-name/action-name) and a shortcut is associated with this accelerator path. All menuitems and toolitems take on this accelerator path. The GTK+ accelerator map code makes sure that the correct shortcut is displayed next to the menu item.
To create an action group call the floowing constructor:
ActionGroup(const String& name);The 'name' argument is the unique name for the action group.
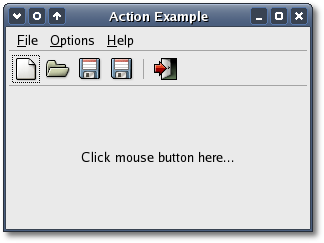
Action Example
Don't be put off by all that theory. The GTK+ user interface manager is not that hard to use, and eventually it will make sense. Not surprisingly, a lot of the code and UI definitions are little more than an exercise in 'cut-and-paste'. I recommend that you build up a set templates for the UI definitions you use, and reuse them.To implement an action-based menu and toolbar system in your application do something like the following. In your main window class header file:
- declare a Gtk::ActionGroup smart pointer
- declare a Gtk::UIManager smart pointer
- declare a private 'add_actions()' method
- define a string containing the UI defintions for the
menuitem and toolitem actions
- create a Gtk::ActionGroup
- create the actions in the add_actions() method and add them
to the action group
- create the Gtk::UIManager and insert the action group into
it
- load the XML UI definitions
- retrieve the menubar and toolbar widgets and pack them into
your application
#include <xfc/main.hh>

#include <xfc/gtk/box.hh>

#include <xfc/gtk/menu.hh>

#include <xfc/gtk/toolbar.hh>

#include <xfc/gtk/window.hh>

#include <xfc/gtk/uimanager.hh>


using namespace
Xfc;


class
ActionWindow : public
Gtk::Window

{

    Pointer<Gtk::ActionGroup> group;

    Pointer<Gtk::UIManager> manager;


    void
add_actions();


protected:

    bool
on_button_press(const
Gdk::EventButton& event, Gtk::Menu *menu);


public:

    ActionWindow();

    virtual
~ActionWindow();


    void
menu_item_selected(const char
*parent, const char *item);


    void
on_file_new();

    void
on_file_open();

    void
on_file_save();

    void
on_file_save_as();

    void
on_file_quit();

    void
on_options_test();

    void
on_help_about();

};
and the source file is <actions.cc>:
#include "actions.hh"

#include <xfc/gtk/accelgroup.hh>

#include <xfc/gtk/eventbox.hh>

#include <xfc/gtk/label.hh>

#include <xfc/gtk/menubar.hh>

#include <xfc/gtk/stockid.hh>

#include <xfc/gtk/toolbar.hh>

#include <xfc/glib/error.hh>

#include <iostream>


// XML menu and
toolbar description


static const char
*ui_info =

"<ui>"

"  <menubar
name='MenuBar'>"

"
<menu action='File'>"

"
<menuitem action='New'/>"

"
<menuitem action='Open'/>"

"
<menuitem action='Save'/>"

"
<menuitem action='SaveAs'/>"

"
<separator/>"

"
<menuitem action='Quit'/>"

"
</menu>"

"
<menu action='Options'>"

"
<menuitem action='Test'/>"

"
</menu>"

"
<menu action='Help'>"

"
<menuitem action='About'/>"

"
</menu>"

"
</menubar>"

"
<toolbar  name='ToolBar'>"

"
<toolitem action='New'/>"

"
<toolitem action='Open'/>"

"
<toolitem action='Save'/>"

"
<toolitem action='SaveAs'/>"

"
<separator action='Sep1'/>"

"
<toolitem action='Quit'/>"

"
</toolbar>"

"</ui>";


ActionWindow::ActionWindow()

{

    set_title("Action
Example");

    set_size_request(300, 200);


    //
Boxes don't receive button events so use an eventbox. The eventbox is
added first

    //
and then all the other widgets added to it.

    Gtk::EventBox *eventbox = new Gtk::EventBox;

    add(*eventbox);


    //
Set the events the eventbox is to receive. These can be any number of
or'd (|) values

    //
from the Gdk::EventMask enumeration.

    eventbox->set_events(Gdk::BUTTON_PRESS_MASK);


    //
Add the packing box to eventbox

    Gtk::VBox *vbox = new Gtk::VBox(false, 1);

    vbox->set_border_width(1);

    eventbox->add(*vbox);


    //
Create the action group and add actions to it.

    group = new
Gtk::ActionGroup("Actions");

    add_actions();


    //
Create the user interfcace anager

    manager = new
Gtk::UIManager;

    manager->insert_action_group(*group);

    add_accel_group(manager->get_accel_group());


    //
Load XML description of the menus from a string.

    G::Error error;

    if (!manager->add_ui_from_string(ui_info, -1,
&error))

    {

        std::cout << "building
menus failed: << " << error.message() << std::endl;

    }


    //
Retrieve a pointer to the menubar.

    Gtk::Widget *menubar =
manager->get_widget("/MenuBar");

    vbox->pack_start(*menubar, false, false);


    //
Retrieve a pointer to the toolbar.

    Gtk::Toolbar *toolbar =
static_cast<Gtk::Toolbar*>(manager->get_widget("/ToolBar"));


toolbar->set_style(Gtk::TOOLBAR_ICONS);

    toolbar->set_tooltips (true);

    vbox->pack_start(*toolbar, false, false);


    //
Retrieve a pointer to the 'File' menu to use as the popup client
menu.

    Gtk::Menu *file_menu =
static_cast<Gtk::Menu*>(manager->get_widget("/MenuBar/File/New")->get_parent());


    //
Bind the file menu to the button_press event and use it as the popup
menu.


eventbox->signal_button_press_event().connect(sigc::bind(sigc::mem_fun(this,
&ActionWindow::on_button_press), file_menu));


    //
Add a label that tells the user to click the mouse button inside the
client area.

    Gtk::Label *label = new Gtk::Label("Click mouse
button here...");

    vbox->pack_start(*label);


    //
Show everything

    eventbox->show_all();

}


ActionWindow::~ActionWindow()

{

}


bool

ActionWindow::on_button_press(const
Gdk::EventButton& event, Gtk::Menu *menu)

{

    menu->popup(event.button(), event.time());

    return true;

}


void

ActionWindow::menu_item_selected(const
char *parent, const char
*item)

{

    std::cout << "You activated the \"" <<
parent << "\" action: \"" << item << "\"" <<
std::endl;

}


void

ActionWindow::on_file_new()

{

    menu_item_selected("File", "New");

}


void

ActionWindow::on_file_open()

{

    menu_item_selected("File", "Open");

}


void

ActionWindow::on_file_save()

{

    menu_item_selected("File", "Save");

}


void

ActionWindow::on_file_save_as()

{

    menu_item_selected("File", "Save As");

}


void

ActionWindow::on_file_quit()

{

    dispose();

}


void

ActionWindow::on_options_test()

{

    menu_item_selected("Options", "Test");

}


void

ActionWindow::on_help_about()

{

    menu_item_selected("Help", "About");

}


void

ActionWindow::add_actions()

{

    using namespace
Gtk;

    using namespace
sigc;


    //
Create Action menu entries

    group->add("File", "_File");

    group->add("Options", "_Options");

    group->add("Help", "_Help");


    Action *action = group->add("New", "_New",
StockId::NEW, AccelKey("<control>N"), "Create new
file");

    action->signal_activate().connect(mem_fun(this,
&ActionWindow::on_file_new));

    action = group->add("Open", "_Open",
StockId::OPEN, AccelKey("<control>O"), "Open file");

    action->signal_activate().connect(mem_fun(this,
&ActionWindow::on_file_open));

    action = group->add("Save", "_Save",
StockId::SAVE, AccelKey("<control>S"), "Save current file");

    action->signal_activate().connect(mem_fun(this,
&ActionWindow::on_file_save));

    action = group->add("SaveAs", "Save _As",
StockId::SAVE, "Save to file");

    action->signal_activate().connect(mem_fun(this,
&ActionWindow::on_file_save_as));

    action = group->add("Quit", "_Quit",
StockId::QUIT, AccelKey("<control>Q"), "Quit");


    action->signal_activate().connect(mem_fun(this,
&ActionWindow::on_file_quit));

    action = group->add("Test", "Test",
"Test");

    action->signal_activate().connect(mem_fun(this,
&ActionWindow::on_options_test));

    action = group->add("About", "_About",
AccelKey("<control>A"), "About");

    action->signal_activate().connect(mem_fun(this,
&ActionWindow::on_help_about));

}


XFC_MAIN(ActionWindow)
Compiling Action
If you compiled and installed XFC yourself, you will find the source
code for Action in the
<examples/actions> source directory along with a Makefile. If
XFC came pre-installed, or you installed it from an RPM package, you
will
find the source code in the
</usr/share/doc/xfcui-X.X/examples/actions> subdirectory. In
this case you will have to create the Makefile yourself (replace X.X
with the
version number of the libXFCui library you have installed).To create a Makefile for Action, add the following lines to a new text file and save it using the name "Makefile":
CC = g++


CFLAGS = -Wall -O2


actions: actions.cc actions.hh

    $(CC) actions.cc -o actions $(CFLAGS) `pkg-config
xfcui-X.X --cflags --libs`


clean:

    rm -f *.o actions
If you cut and paste these lines make sure the whitespace before $(CC) and rm is a tab character. When you compile and run this program you will see the following window appear:
Also have a look at the two test programs, another action example in the <tests/actions> and a menu merge example in <tests/megremenus>. They implement most of the features described above.
The XFC_MAIN macro is a convenience macro that writes a simple main function, its only argument is the name of the main window class. The macro is defined in <xfc/main.hh> as:
#define XFC_MAIN(MainWidget)\

    int main (int argc, char *argv[])\

    {\

        Xfc::Main::init(&argc,
&argv);\

        MainWidget main_widget;\


main_widget.signal_destroy().connect(sigc::ptr_fun(&Xfc::Main::quit));\

        main_widget.show();\

        Xfc::Main::run();\

        return 0;\

    }
Most main functions in C++ are simple because all the creation work for the main window is done inside its constructor, not the main function.
| Copyright © 2004-2005 The XFC Development Team | Top |
XFC
4.4 |