| « Index | Hello World | Adding a
menubar and toolbar
» |
Chapter
3: Hello Buttons
Let's take a look at Hello Buttons, a slightly improved version of Hello World that provides a better example of using libsigc++ signals and slots. Hello Buttons makes use of a horizontal packing box to pack two buttons into the main window. A packing box is a rectangular layout container that lets you pack one or more child widgets inside it, with respect to a particular position, either the start or the end. A packing box is a very convenient way to manage the position and relative size of several child widgets.
One thing you will notice in the Hello Buttons source code is that the signals and slots make use of the sigc::bind() function to bind an extra argument that gets passed to the connected slot every time a "clicked" signal is emitted. This is one of the many powerful functions available in the libsigc++ library, and one that you will use frequently, so do familiarize yourself with its documentation.
The header file for the Hello Buttons program is <hellobuttons.hh>:
#include
<xfc/main.hh>

#include <xfc/gtk/window.hh>


using namespace Xfc;


class HelloButtons : public Gtk::Window

{

protected:

    void on_clicked(const char *text);


public:

    HelloButtons();

    virtual ~HelloButtons();

};
and the source file is <hellobuttons.cc>:
#include
"hellobuttons.hh"

#include <xfc/gtk/box.hh>

#include <xfc/gtk/button.hh>

#include <iostream>


HelloButtons::HelloButtons()

{

    // This is a new call, which just sets
the title of
our new window to "Hello Buttons!"

    set_title("Hello Buttons");


    // Set the default
size    of the
window

    set_default_size(200, -1);


    // Sets the border width of the window.

    set_border_width(10);


    // We create a box to pack widgets into.
The box is
not really visible, it is just used

    // as a tool to arrange widgets.

    Gtk::HBox *box = new Gtk::HBox;


    // Put the box into the main window.

    add(*box);


    // Creates a new button with the label
"Button 1".

    Gtk::Button *button = new
Gtk::Button("Button 1");


    // Now when the button is clicked, we
call the slot
function with a pointer to "button 1" bound to it.


button->signal_clicked().connect(sigc::bind(sigc::mem_fun(this,
&HelloButtons::on_clicked), "button 1"));


    // Instead of Gtk::Container::add, we
pack this
button into the invisible box, which has been added to the window.

    box->pack_start(*button);


    // Always remember this step, this tells
Inti that
our preparation for this button is complete,

    // and it can now be displayed.

    button->show();


    // Do these same steps again to create a
second
button

    button = new Gtk::Button("Button 2");


    // Call the same slot function with a
different
argument, passing a pointer to "button 2" instead.


button->signal_clicked().connect(sigc::bind(sigc::mem_fun(this,
&HelloButtons::on_clicked), "button 2"));

    box->pack_start(*button);


    // The order we show the buttons is not
really
important, but I recommend always showing the window last,

    // so it all pops up at once.

    button->show();

    box->show();

}


HelloButtons::~HelloButtons()

{

}


void

HelloButtons::on_clicked(const char *text)

{

    std::cout << "Hello again"
<< " - "
<< text << " " << "was
pressed" << std::endl;

}


int main (int argc, char *argv[])

{

    using namespace Main;


    init(&argc, &argv);


    HelloButtons window;


window.signal_destroy().connect(sigc::ptr_fun(&Xfc::Main::quit));

    window.show();


    run();

    return 0;

}
Compiling Hello Buttons
If you compiled and installed XFC yourself, you will find the source code for Hello Buttons in the <tutorial/chapter03> source directory along with a Makefile. If XFC came pre-installed, or you installed it from an RPM package, you will find the source code in the </usr/share/doc/xfcui-X.X/tutorial/chapter03> subdirectory. In this case you will have to create the Makefile yourself (replace X.X with the version number of the libXFCui library you have installed).To create a Makefile for Hello Buttons, add the following lines to a new text file and save it using the name "Makefile":
CC = g++


CFLAGS = -Wall -O2


hellobuttons: hellobuttons.cc hellobuttons.hh

    $(CC) hellobuttons.cc -o hellobuttons `pkg-config
xfcui-X.X
--cflags --libs`


clean:

    rm -f *.o hellobuttons
If you cut and paste these lines make sure the whitespace before $(CC) and rm is a tab character. When you compile and run this program you will see the following window appear:
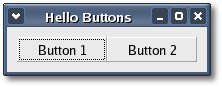
Run the program from a command shell. This time you will notice that there is no easy way to exit the program; you have to use your window manager or command line to kill it. A good exercise for the reader would be to insert a third "Quit" button that will exit the program. You may also wish to play with the options passed to Gtk::Box::pack_start(). Try resizing the window, and observe the two buttons' behavior.
Stepping through the source code
The "clicked" signals for both buttons are connected to the same signal handler:void on_clicked(const char *text);
but the "clicked" signal handler must have the following prototype:
void on_clicked();
Sometimes it's convenient to connect several widgets to the same signal handler. If you do this, you need some way of identifying the widget emitting the signal. In Hello Buttons it's a text string but it could easily be an integer value, or a widget pointer. To accomplish this feat using libsigc++ we use the sigc::bind() template function. This function can be used to bind up to 7 arguments to the bound slot, but usually you will only ever use one or two. You can also specify a zero-based position for each bound argument in the function's parameter list. Usually though, you will pass extra arguments at the end. A position value of 0 indicates 'pass as the first argument'. A position value of -1, or no position value indicates 'pass as the last argument'.
For example, this call from the source code:
button->signal_clicked().connect(sigc::bind(sigc::mem_fun(this,
&HelloButtons::on_clicked), "button 1"));
is equivalent to this call:
button->signal_clicked().connect(sigc::bind<-1>(sigc::mem_fun(this,
&HelloButtons::on_clicked), "button 1"));
and because on_clicked() takes only one argument, it is also equivalent to this call:
button->signal_clicked().connect(sigc::bind<0>(sigc::mem_fun(this,
&HelloButtons::on_clicked), "button 1"));
As you can see, the source code is more readable if you do not specify a position and pass any extra arguments at the end of the parameter list. bind() works by returning a slot that takes the number of arguments the signal being connected to expects.
After finishing the first three chapters of this tutorial you should have a basic understanding of GTK+ programming using the Xfce Foundation Classes. Now it's time to move on to more advanced topics. Before proceeding though, if you are unfamiliar with Packing Boxes or the GTK+ User Interface Manager, you should read the related HOWTO.
In the next chapter we will add an action-based menubar and toolbar to the XfcApp application from chapter 1. Then remainder of the tutorial will take you step by step through the process enhancing XfcApp, adding such features as a composite statusbar, a client area and a pop up context menu. The last two chapters cover two important topics. In Chapter 8 you will build XfcApp into a fully compliant GNU autotools project, then in chapter 9 you learn how to add international language support. After completing this tutorial you will have written your own reusable application shell and you should know how to use the GNU autotools to manage your projects. An updated copy of each chapter's source code can be found in that chapter's subdirectory.
| Copyright © 2004-2005 The XFC Development Team | Top |
XFC 4.4 |